ads

Slider[Style1]

Style2

Style3[OneLeft]

Style3[OneRight]

Style4

Style5

Safely clean the Registry with Auslogics Registry Cleaner

Let’s be honest: I’m not a big fan of Registry cleaning tools. Through the pages of Support Squad I’ve seen first-hand the damage they can do to perfectly functioning Windows systems.
They’re often billed as a magic cure for problems or promise performance improvements, but if you scan blindly and let a Registry cleaning tool simply delete everything it finds you’ll eventually run into trouble – and you won’t notice any speed boost either.
Despite all this, Registry cleaning tools can help fix problems by tracking down rogue entries and deleting them – the trick is knowing how to use them carefully.
In this tutorial, I’ll show you how to selectively search for, analyse and remove entries. Just as importantly, I’ll also reveal how to put them back again should your clean-out create more problems than it solves.
Safely clean the Registry with Auslogics Registry Cleaner

Install program

First, install Auslogics Registry Cleaner from your free disc. During installation you’ll be prompted to install Auslogics BoostSpeed alongside it; we recommend unticking this box. The next screen will offer you additional programs – verify ‘Custom install (advanced)’ is selected, with no additional boxes ticked, to skip installing them all. Click Next and the program will install.

Take precautions

Before proceeding any further, take a System Restore point: open the Start menu or press [Win] + [Q] to open the Search charm in Windows 8. Type ‘system restore’ and click ‘Create a restore point’ under Settings. Click ‘Create’, give your Restore point a suitable name and click ‘Create’ again to set up a fail-safe backup which you can restore should it prove necessary.

Pre-scan checklist

Switch back to Auslogics Registry Cleaner, then open the Settings menu to verify ‘Back Up Changes’ is ticked. The left-hand pane reveals which areas of the Registry have been selected for scanning – right-click this column and choose ‘Check Safe Only’ to ensure only safe areas are ticked for now. Once done, click the ‘Scan Now’ button and wait while the scan is performed.

Results overview
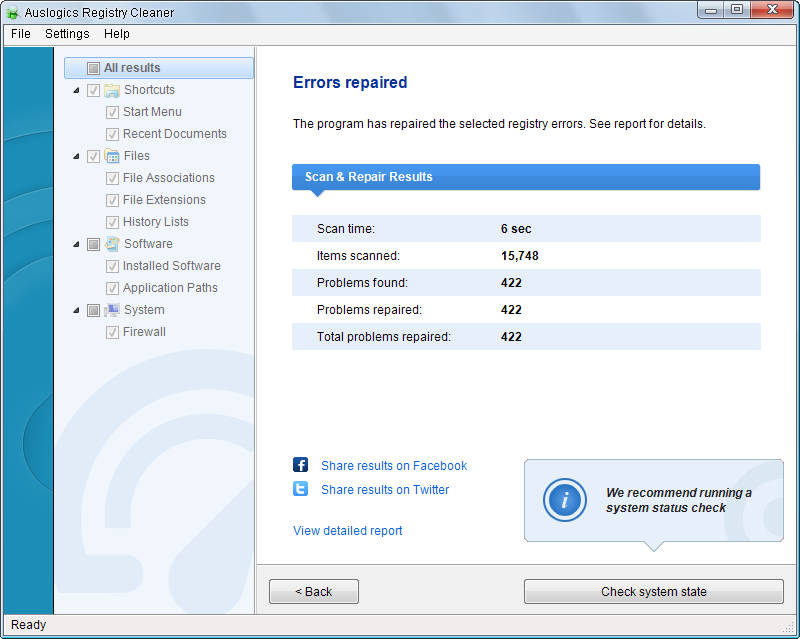
clean the Registry with Auslogics Registry Cleaner Don’t be alarmed at the hundreds or even thousands of ‘errors’ it finds – many of these can be left safely in place without any impact on your computer’s stability or performance. The results divide these into their parent categories; again, don’t worry about the levels of severity assigned to each section – remember that most of these errors have no detrimental effect.

Explore in depth

Use the annotation on the previous page to help identify problem entries. Most entries should yield some clue to their origin. Look for references to a specific program, or click the ‘Google it’ button to perform a search using that Registry keyor value, which may throw up people with similar problems and – if you’re really lucky – potential solutions to try.

Select all and repair
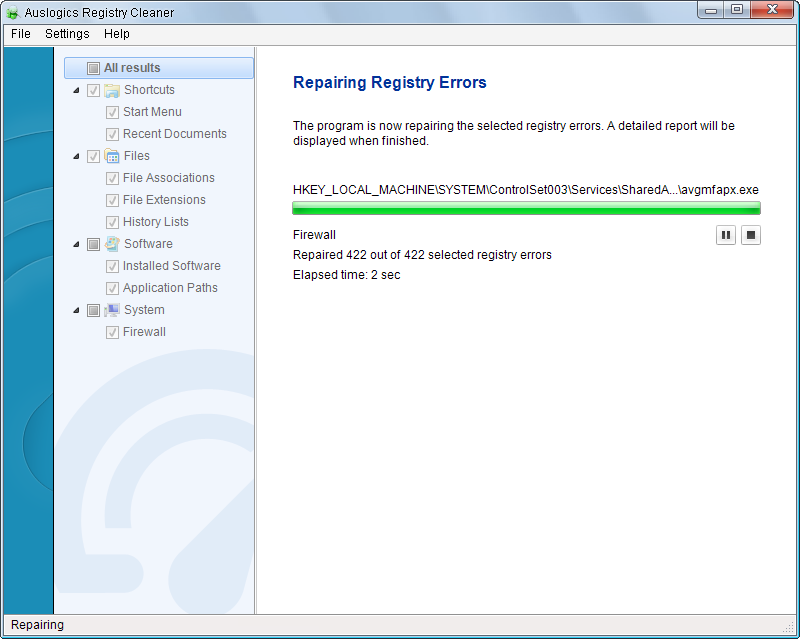
Safely clean the Registry with Auslogics Registry Cleaner By default, all problems are selected – clicking ‘Repair’ removes them all. If you’re unable to identify a specific Registry entry that you believe is causing your problem you could – with some risk – try removing them all. Click ‘Repair’, then reboot and analyse to see if the problem has gone. If it hasn’t, or other problems emerge, jump to step nine to restore the backup.

Be selective

Alternatively, right-click ‘All results’ and choose ‘Uncheck all’ to select nothing by default. Now manually place a tick next to the entries you wish to remove. When you’re done, verify ‘Back Up Changes’ is ticked, then click ‘Repair’ to remove only those entries you’ve selected. After the repair completes, click ‘View detailed report’ to see exactly what was deleted, if necessary.

Search for Registry keys

Select ‘View > Find Registry Keys’ to perform a manual examination of the Registry for keys to examine and potentially delete. Use the ‘Filter’ button before clicking ‘Search’ to restrict your search. Note that Auslogics Registry Cleaner provides no indication of whether a key is a problem or not; it simply returns all results. Manually select entries to delete, then ‘Clean up’.

Restore keys

Should you run into new problems after cleaning the Registry, select ‘File > Rescue Center’ to browse available backups and Restore points. Start by right-clicking your most recent backup and choosing ‘Restore’ – click ‘Yes’ to restore all deleted entries from that backup (you can’t choose single entries). If this fails to work, select ‘Restore Points’ and your System Restore file.

Registry cleaning made easy

Armed with these tips, you should now be able to safely remove Registry entries when the need arises – advanced users can go even further and include more ‘dangerous’ sections of the Registry, including ‘Missing Software’ and ‘Shared DLLs’, when scanning for problems. Note that indiscriminately cleaning these sections could cause major problems, so proceed with caution.

Lenovo N20p Chromebook review

A versatile Chromebook experience for a reasonable price

£199.99 | $344.99

The Lenovo N20p is the one of the first multi-mode Chromebooks, which is an accomplishment all on its own. With just a flip of the keyboard, this Chromebook transforms from laptop to tablet mode. When you consider that the device weighs only 1.4kg, is sleek and perfect for everyday use, you’ll fall in love with this machine. It’s more expensive than other leading laptop-only Chromebooks, such as the Acer C720 Chromebook and the HP Chromebook 11, but the tablet viewing capability is worth the extra cost.
Lenovo N20p Chromebook

The N20p is a Chrome laptop with a 10-point multi-touch display. Features and specs are nothing special or out of the ordinary, but they come together to create a pretty seamless machine. There is an 11.6-inch, 1,366 x 768 touchscreen, which doesn’t compare to the Toshiba Chromebook 2’s 1080p screen, but it’s a decent enough display for everyday use.
The N20p also features a quad-core Intel Celeron processor, 16GB of eMMC storage, 4GB of DDR3 RAM and a 1MP webcam.
This is all standard spec-wise for a Chrome OS notebook, and while it doesn’t impress like the Acer 13 Chromebook – which is powered by Nvidia’s ARM Cortex A15-based Tegra K1 – you won’t find the computer lagging behind at all.
The chiclet-style keyboard is relatively standard, although the smaller size of the computer creates the impression that some standard key functions are being left off.
Despite this, the travel between the keys is more comfortable than on most small laptops. The trackpad is crisp, responsive and gives a very satisfying click when it’s selected. 
The non-click touch option with mouse movements and gestures (that is, two-finger scrolling) is just sensitive enough to require minimal tapping, but not overly sensitive to the point where you find yourself making many accidental or phantom swipes.

Fast mover

With its 2.16GHz Intel Celeron N2830 CPU, the N20p feels spritely when completing everyday tasks such as checking email and surfing the web. Even with a large amount of tabs open (which we’re all guilty of), there was minimal slowdown of processes thanks to the integrated graphics processing, which is sufficient for basic web browsing. An especially nice touch is the super-quick start-up time for the machine, which also means that powering down the machine when you’ve finished working involves less waiting around.
Performance is on a par with competing systems, with fast boot times (going from cold start to login screen in under 10 seconds) and quick browsing. With the built-in Camera app, 1,280 x 720 photos came out blurry, even with relatively good lighting, rendering and leisure activities, the battery lasted anywhere from 6-8.5 hours. This smaller internal battery allows for a slimmer design, which makes the slate-grey device sleek and easily portable.

Well-connected

It’s obvious Lenovo has spared no expense in terms of connectivity, too. The N20p features Bluetooth 4.0 as well as 802.11ac Wi-Fi. Since the Chrome OS relies so heavily on an internet connection for nearly everything, state of the art 802.11ac pictures that were darker than expected. Video chats seem to fare better, with users at the other end having no issue with video quality.
Performance is on a par with competing systems, with fast boot times and quick browsing
One disappointment is the sound quality from the laptop’s tiny speakers. Located underneath the chassis, the speakers get some more breathing room in stand mode, where they actually project toward you. But the sound was still tinny and somewhat lacking bass, which seems to be a norm for small laptops. This is particularly a letdown for this system given the N20p lends itself to video viewing, but sadly the audio hardware just doesn’t match up.
The 34.8-watt-hour battery life is good, as promised: after heavy and extended use with both business networking gives the N20p a real edge in this area.
Among the N20p’s best features are the touch control and stand mode; their versatility makes this a great leisure and possibly a work device. You might have some difficulty when using it as a tablet, as Chrome isn’t entirely tailored to touch control, being a largely browser-based operating system, so we’d recommend using this for recreational activities rather than heavy business use.The 300-degree-rotation hinge lets you flip the N20p’s display backward all the way into stand mode, which lends itself nicely to viewing movies or showing presentations, as the image flips automatically to match the display.

Read ebooks using Icecream Reader

Ebooks are a lot more convenient than printed matter (although obviously paper magazines are still fine, we’re bound to say). They’re a lot lighter for one thing – a bagful of hardback books can seriously weigh you down. 
While a fully loaded e-reader isslightly heavier than an empty one, due to the extra weight of trapped electrons in the storage media, it’s only in the region of a billionth of a billionth of a gram: not something that’s going to perturb even the strictest airline baggage allowance.
If you’re carrying a laptop, an ebook app for Windows is even lighter. Amazon’s Kindle app ties you in to the company’s ecosystem, but for non-Kindle owners who want to read ebooks on their PCs, the choice is a little broader. Here, we’ll show you how to discover the world of ebooks using the free Icecream Ebook Reader app.

Read ebooks using Icecream Reader

Get some books

Read ebooks using Icecream ReaderThe open EPUB ebook format is supported by many booksellers, including Waterstones and Barnes & Noble, but not Amazon. Many free classic and self-published titles are available in this format. Some ebooks are also available as PDF files, which ebook readers can also open. Out-of-copyright classics are available from Project Gutenberg (www.gutenberg.org).

Install Ebook Reader

Point your web browser to www.icecreamapps.com/Ebook-Reader and download and run the installer. Once done, run the app either by double-clicking its icon or by ticking the ‘Launch Icecream Ebook Reader’ box on the installer’s final page. It’s not a large application, but be aware that a library of ebooks can take up a decent chunk of space.

Add titles to library

Your library is empty to begin with. The app doesn’t have a store from which you can buy books, so they need to be downloaded manually to your hard drive. It’s a good idea to save them in an Ebooks folder within Documents, so that they’re easy to manage, and so you can be sure they’re processed by any backup program you use. 
Use this simple, free ebook-reading app to enjoy literature from different periods and countries from the comfort of your PC.

Read it!

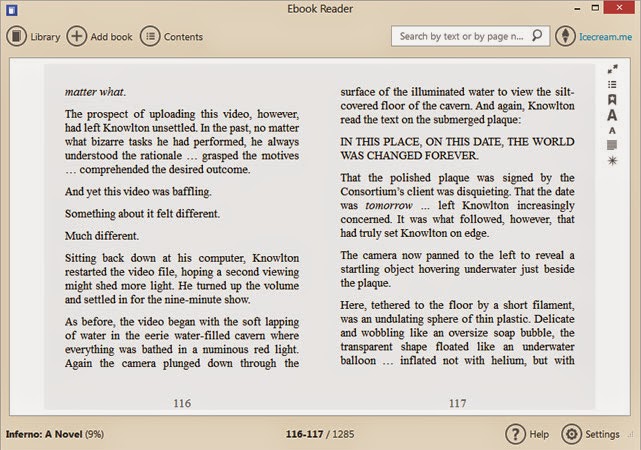
Read ebooks using Icecream ReaderFind somewhere comfortable to sit, make a cup of tea, and settle in to read. Navigating an ebook is easy. A click on the right edge of the page or a tap of the spacebar takes you forward a page. Click the left edge to go backwards. Alternatively, use the left and right arrow keys, Page Up and Page Down, or the mouse wheel. The Home and End keys jump to the start or end of a book.

Settings

Access Ebook Reader’s settings page by clicking the cogwheel icon at the bottom-right of the window. There are just two options. The bottom one sets the language in which the app is displayed, while the top enables you to choose a colour scheme: white for daylight, dark blue for night, and a sepia that’s closer to daylight but easier on the eyes over long periods.

Bookmarks

Bookmarking works just like its paper counterpart. When reading a book, click the icon with a star on it (towards the upper-right) to add a bookmark. You can manage bookmarks, or jump straight to a bookmarked page, by clicking the ‘bullet list’ icon at the top-right of the window. To search for text, type it into the box at the top of the window and press Return.

Other controls

There are additional controls alongside those for bookmarking. The top icon switches to full-screen mode. The capital ‘A’s change the text size, while the paragraph icon toggles between one or two columns of text. Narrower columns are easier to read, but a single wide one can help if pictures take up much of the page width. The last icon controls the colour scheme.

Delete a book

Removing a book from your library within the Ebook Reader app doesn’t remove it from your hard drive but does make it unavailable to read until you add it again. Go to your library, switch to Table view and click on the dustbin icon in the book‘s row. A dialogue will ask if you’re sure. If you are, click the OK
button to get rid of the incriminating evidence.

Read great comics for free

Dynamic and stylish, comics are a fantastic way to enjoy a story, with the dialogue, narration, art style and perspective all playing a part in developing the world and its characters. Finding great comics used to mean trawling through the crowded shelves of a (sometimes gloomy and strangesmelling) shop, but the Comics app by ComiXology puts them all at your fingertips, wherever you are.The app features over 30,000 comics and graphic novels from publishers including Marvel, DC and Image (the people behind X-Men, Superman and Spawn, respectively). You'll also find a wealth of comics by smaller publishers, making it a great way to find new titles and fresh ideas.Best of all, ComiXology’s app works on all your Windows 8 devices, so you can start reading one on your PC, then finish it later on the train using your tablet. Let’s get started!
Read comics for free

Get the app 

Open the Windows Store and searching for ‘ComiXology’.A few apps will appear, but you want the first in the list – simply called ‘Comics’. Select it and click ‘Install’. The app and many of the comics are free, but there are also paid-for titles available, so you can choose to set up payment options. When the app has installed, a notification appears at the top right. Click to launch it.

Find free comics 

The first time you open the app, you’ll see a notification asking if you want it to run in the background and place status notificationson your Lock Screen. Have a think and choose an option. You’re ready to choose somethingxp to read. There are lots of tempting new releases on the home screen, but let's start by selecting ‘Free comics’ and picking from the titles here.

Once you’ve read a comic, remember to rate it to help other app users decide whether to take the plunge .

 Get a preview

You’ll only see six free comics listed at first, but there are dozens more – use the arrow button beside ‘Recommended freebies’ to see them. Once you see one that takes your fancy, click it and you’ll be taken to its product page, which shows you its credits, publication date, number of pages and more. There’s also a brief description, followed by a preview.

Make an account 

Click the button labelled ‘Free’ to add the comic to your shopping cart, then click the cart icon at the top-right and select ‘Checkout’. You’ll now be prompted to create an account for the app, so enter your details. The email address you enter will be used to send you notifications when you buy and download new comics. When you’ve finished, click ‘Create’ and log in.

Enter card details (but don’t pay!) 

Although you’ve chosen a free comic, you’ll still be taken to a billing page and asked to enter credit card information. Don’t worry, your card won’t be charged – this step just makes it easier if you want to splash some cash in the future. Enter your details and click ‘Proceed’. The transaction will be processed and you’ll see a page featuring all the comics you own. Click ‘Read’.

Turn the pages 

Now the fun begins. You’ll see the cover of your comic with an arrow to the right, which you can click to turn the page. If you have a Windows 8 tablet, this would be a great time to start using it; holding the display in your hands and tapping the screen is much more like reading an actual comic book than clicking a mouse button.

Get dynamic

Double-click (or double-tap) the page you’re reading to enter Guided View. This is a brilliant feature exclusive to ComiXology’s app, which zooms in on sections of the comic in the same way your eyes would move if you were reading it on paper. It’s not available on every issue, but when it is, it’s a dramatic way to read a story.

Thanks to Comics by ComiXology, it’s never been easier to get a slice of the comic-book action.

Know your options 

Right-click the black background and three icons will appear in the bottom right: ‘i’ for information, ‘?’ for help, and a book icon that reveals a storyboard at the top of the screen, enabling you to hop quickly between pages. What did Superman say on page four? Ah yes, the knife was Kryptonite! At the top left you’ll see an arrow that will take you back to the app’s home page.

Browse and discover 

One of the best things about ComiXology’s app is how it simulates the experience of browsing through shelves of comics and flicking through the pages of whatever catches your eye. Choose a series and every book will appear on screen at once.If you enjoy one, it’s easy to go back and find the next in the series – and the next, and the next…

Fill your virtual shelves

Congratulations, you now know everything you need to download and enjoy world-class comics from some of the biggest (and smallest) publishers in the business. Many are free and even the paid-for ones rarely cost more than $10, so it’s an easy and affordable way to build up an impressive collection. And all without setting foot in a little shop smelling of musty carpet…

PC Troubleshooting

There’s an amazing feeling of pride from building your own PC. You’ve chosen the perfect parts, ones that mix the best power you can get with your budget, and aimed at no one else’s idea of what you need. You’ve carefully installed them all, you’ve wired your system together, screwed in the last screw, and hit the power button for a quick test, and...Nothing Nada. Zip.
PC Troubleshooting
There’s nothing that’s going to make you feel quite so small. But do not despair! This actually happens to the best of us, and while it may seem daunting fi nding out what’s gone wrong, and how you can fix it, is just a matter of being thorough.
Double check the wire placement with the diagram in your motherboard’s manual.
First things, do check it isn’t something obvious. Check your power cables, and make sure your PSU doesn’t have its own power switch – if it does, make sure it’s switched on. If all of that’s fine, it’s time tostart working down the line. Check the wall socket – you never know – and any powerboard you might be using. Then check the voltage switch on your PSU, and make sure it matches local voltage. If all this works, switch out the power cable you’re using, in case that’s the culprit – if you’re at all like a lot of us in the o†ffice, you’ll have a lot of these, and they can fail in time.
At this point, if everything outside the case is working, it’s time to dive back in.This may sound odd, but give the inside of your case a good sniˆ . If you’re smell anything burnt or like ozone, or if you can hear a high-pitched whine from the PSU, guess what – it’s your PSU. It’s much rarer than it used to be, PSUs tend to have two points of failure – and they’re at the end of their life (obviously), and when fi rst turned on in your shiny new PC. If this is the case with your build, test a spare PSU; you’ll likely have the one from your old PC, and it’ll do fi ne for testing.If it works, return your faulty unit and get a new one. You should be fi ne at this point, and get about installing your operating system.If all seems fi ne with your PSU, the next most likely culprit are the headers for the power switch on the front of the case. These simple cables are usually nested in amongst audio and LED cables, as well the reset button, and are quite easy to install in the wrong spot. Double check the wire placement with the diagram in your motherboard’s manual.These are the most common problems with a newly built PC, and every time we’ve had a system fail to power up, it’s been one of these things. That said, if everything is in order, see if your motherboard has its own power button (many overclocking models will), and try that. If that works, it’s likely the case’s power switch that is the fail point. You can either contact the manufacturer for a replacement, or, again, return the unit and get a new one.
If you’re still living in the Land of No PC, well... now things get really tedious. At this stage, it’s likely going to be a component issue. 
Change out the CMOS battery, and if that still doesn’t do the trick, then it’s time to get drastic and consider the possibility that your motherboard is hors de combat. Essentially, even testing this theory means basically rebuilding your system.
We’re sorry
Unless, of course, it’s our old nemesis heat, or a faulty PSU that’s slowly failing. 
is starting, but still failing to complete the boot process properly. If you’re getting power – fans turn on, drives start to whine, and so on – but the machine then shuts down, it’s likely a fault of some kind that can be found by following the above process of checking cables and internals. 
In this instance, though, checking the CPU is properly seated is probably a good idea. Your machine could also get stuck in a cycle of powering up, shutting down, then powering up again, basically looping on and off. Nine times of then this means you’ve either got a faulty motherboard, or your PSU is either faulty, or possible not powerful enough.
There are a lot of possible errors to list, and our space is limited, but in all our experience, we’ve found we’re never alone when it comes to odd startup errors. The internet, however, is your friend.

ALL OPERATING SYSTEMS ARE... NOT GO

So, you’re machine is powering on, you’ve gone through the Windows install process (and had a cup of co ee while waiting), and you think you’re all good to go... And bam.
If your machine powers on, and stays on (woohoo!), but shows an error message before booting into the OS, and stops there, take note of the error.
Common errors include ‘BOOTMGR is missing’ or ‘NTLDR is missing’; in fact, it’s usually a missing fi le or driver of some kind that is the culprit. As we said, take note of the exact message, and try searching for it on Google (on a working device, of course) – you’ll more than likely fi nd exactly how to go about dealing with the problem, from messing about with boot orders in the BIOS to running a Startup Repair of Windows.
It’s also possible that you’re new machine works well for a while, but then either blue-screens or shuts down entirely. Depending on your Windows OS (yes, we’re talking Windows, because talking about multiple OSes could fi ll a LOT of pages), you should access MSconfig or System Configuration. Select the Diagnostic Startup option, reboot, and see how things go. If all is well, start re-enabling applications. It’s a little tedious, but it should fi nd what’s causing the issue.
Unless, of course, it’s our old nemesis heat, or a faulty PSU that’s slowly failing. The latter is unlikely, so see if your motherboard comes with any tools for monitoring CPU and system heat. It’s entirely possible that if your new build is not adequately cooled, that slow heat build-up is causing the issues. If you’re CPU isgetting toasty, think about installing some extra fans, or double check the airfl ow in case cables are getting in the way.Troubleshooting can be tiring, but hopefully, after all this, you’ll have a smoothly running system. And speaking of tiring, I think even I need a nap.

Partition your hard drive

In many hard drives, your documents, photos and music are saved to the same area where your Windows operating system and software are located. Defragmentation can help organise everything, but having all your personal files crammed alongside Windows can really slow the whole system down. The process of partitioning solves the problem, enabling your Windows operating system on the hard drive and software to be digitally fenced off on a streamlined virtual hard drive. 

Partition your hard drive
Windows 7 itself can create a partition, but MiniTool Partition Wizard (www.partitionwizard.com) is a free alternative software that’s more advanced, yet easier to use.Once installed and loaded, notice the bar graph representing the available space on your hard drive. Right-click on the section where OS and your files and software are stored (usually the C: drive) and select the ‘Split’ option. Inside the new window, move the slider to the point where you’d like your partition, but remember to leave at least 20GB of free space with Windows to allow for future software installation. Next, click ‘OK’, followed by the ‘Apply’ button in the top-left of the main window.
PARTITION TIME: Dividing your files from OS and software apps is great, but regular defragmentation is important, too
The partition will now be created and another virtual hard drive will have magically appeared in your Windows Explorer menu for you to transfer your personal files unto.

Free antivirus that still supports Windows XP

Microsoft no longer protects you in Windows XP, but there’s plenty of free security software that does. outlines the best antivirus tools for XP
Don’t be fooled by Microsoft’s recent U-turn on patching Windows XP. The surprise security fix for Internet Explorer 8 (the last internet explorer version that works with Windows XP) doesn’t mean that XP is now safe after all, or that the end of support for XP on 8 April was a big lie to get us all to upgrade to Windows 8. The internet explorer 8 patch on 1 May was a one-off, and it’s very unlikely there will be any more.
Microsoft will continue to update XP’s built-in security software, including Microsoft Security Essentials (http://bit.ly/1fxEN7D) and Windows Defender, and it still updates its virus definitionsin XP. But that just won’t cut it. Th  ese tools score far below many free alternatives in antivirus tests, so it’s dangerous to rely on them. One recent Windows Defender update on the internet even caused thousands of XP computers to crash at startup. As a result, Microsoft’s Technet forums were flooded with angry posts from Windows XP users (read them at http://bit.ly/1p9s6Zm). 
To stay safe in Windows XP, you need to build a solid wall of third-party security tools that do the job Microsoft no longer does. Antivirus companies are busy releasing and updating programs to meet demand from the Windows XP users that Microsoft has abandoned, so you have plenty to choose from.
Free antivirus that still supports Windows XP

Keep viruses off your XP PC

The best antivirus products that keep you safe in Windows XP come at a price. Premium suites Kaspersky Internet Security 2014 (www.kaspersky.co.uk), Norton Internet Security (uk.norton.com) and ESET Smart Security 7 (www.eset.co.uk) achieved the best results in the latest Home Antivirus Protection test by our security team at Dennis Technology Labs.
But right behind them were two completely free products: Avast Free Antivirus (www.avast.com) and AVG AntiVirus Free 2014 (http://bit.ly/1todjWi). Avast Free Antivirus is easy to use and very powerful security, with various scan levels that range from very fast to very thorough. Its database of virus definitions is updated constantly to give you ongoing protection, even against zero-day vulner abilities like the one Microsoft eventually patched on 1 May. Avast has pledged to support XP for at least another two years, which is great news to the 27 per cent of Avast users who still use XP and don’t plan to change. 
AVG AntiVirus Free is less powerful than Avast, but it also uses up much less processing power, so it’s ideal if your computer is a bit old or slow. AVG says it has “no plans to stop supporting XP users” and that XP will receive virus definitions “for the forseeable future”, which our Technology Labs team defines as 2016 or later. Read AVG’s statement at http://bit.ly/1BYABMz.
Try out all these programs to see which suits your needs best, but only keep one on your computer. If you have two security antivirus programs running at the same time they will conflict, eff ectively identifying each other as viruses and stopping either program from working properly. Having two antivirus programs is as bad as having no antivirus at all.

Find and remove malware

The outstanding security anti-malware program Malwarebytes Anti-Malware Free (www.malwarebytes.org) is designed to run alongside your antivirus, and won’t conflict with it. The new version of Malwarebytes includes “guaranteed lifetime support” for XP. Malwarebytes told Computeractive: “We will continue to support XP for as long as it’s technically possible. Th  at goes for our free version as well as premium. Twenty per cent of our users still run XP, and they shouldn’t have to pay to get protected.” Each time you open Malwarebytes it updates its database, so it won’t overlook any recent malware or PUPs (Potentially
Unwanted Programs), such as adware that slow down your computer and could be used by hackers to break into your PC.Select ‘Perform full scan’ the first time, then use the default ‘quick scan’ every week or two to keep your computer clean. It’s a portable program, so you can run it from the EXEfile on a USB stick to check for unwanted nasties on a friend or family member’s computer.

Block threats in Internet

Internet Explorer, Firefox and Chrome Web Of Trust (www.mywot.com/download) is a free add-on for internet explorer, Firefox and Chrome that uses a traffi c-lights system to warn you about phishinglinks, malicious sites and other traps. A green icon indicates that a link has excellent safety reports; amber is ‘unsatisfactory’ and red means ‘poor’. Red links are blocked by default, but you can still click them if you really want to. Web Of Trust is internet browser based and constantly updated, so it’ll always work in Windows XP.
A firewallis another essential weapon against threats from the web. Comodo Firewall Free (http://bit.ly/1zMP5KB) works alongside your antivirus and anti-malware programs and acts like a shield to protect you against threats like internet malware and zero-day attacks. Its current version still works in XP. 
Note that if you’re using Internet Explorer in XP you should be extra vigilant. Iinternet Explorer’s popularity makes it a prime target for hackers.

Top